Photobashing for Indie TTRPG Art
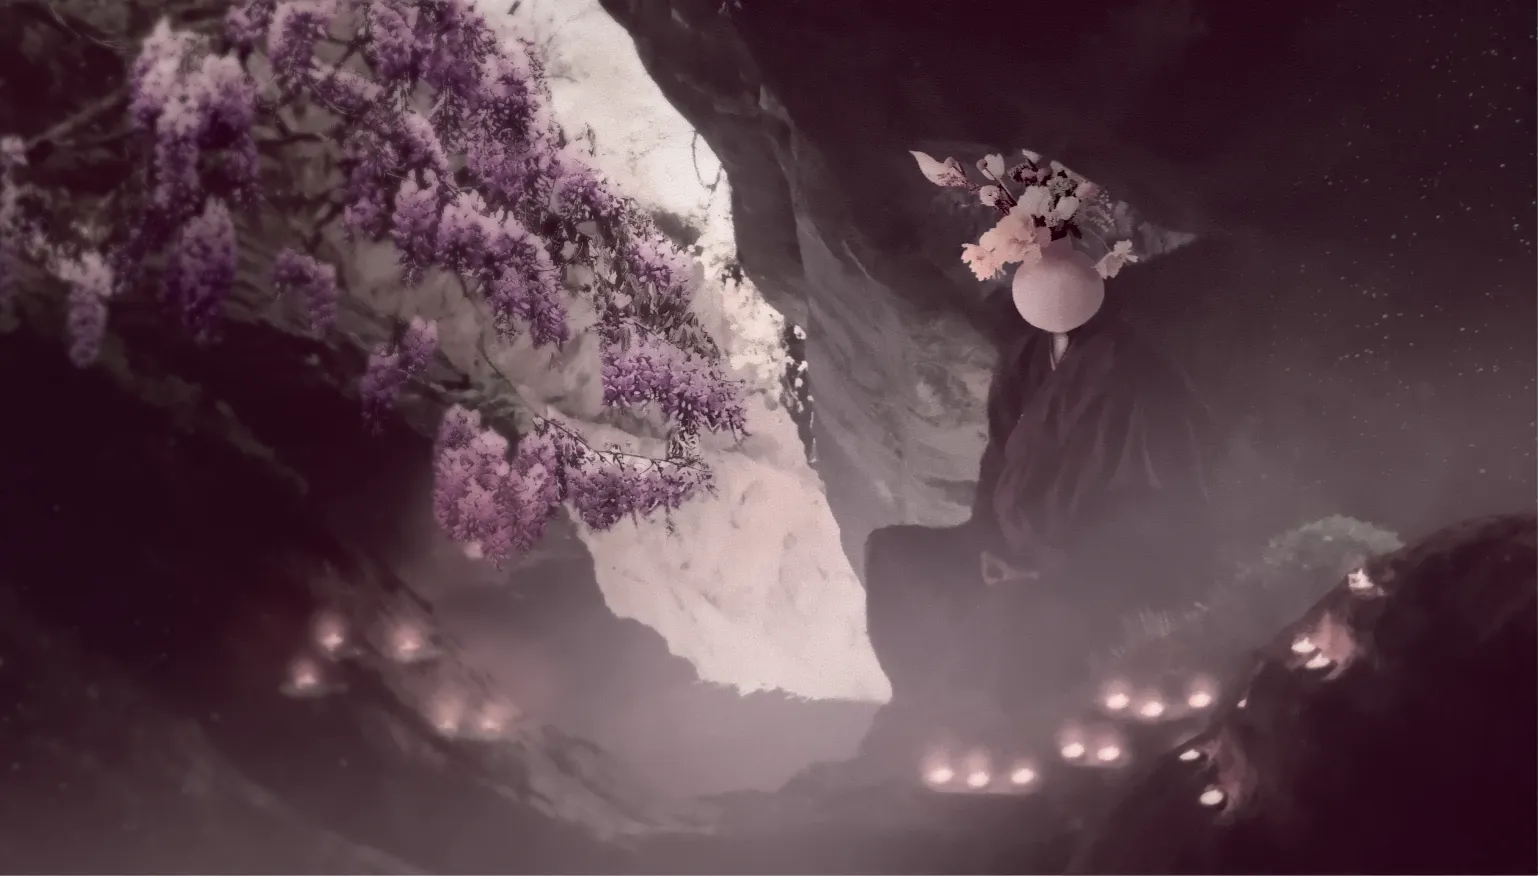
I’ve been using this technique to generate unique and serviceable art for my indie ttrpg projects for a while now. The general idea is to cut out and collage, manipulate, and bash pictures together to create something new and special for the rpg. This process is usually called photobashing or photomanipulation or photoshoping. I’ll be doing this process in Affinity Photo rather than photoshop though. I’ll also be adding a particular effect near the end that gives the finished product something of a painterly, or at least a bit smoother feel.
Note that I’ve said “serviceable”, this is because obviously, this is not going to replace good, commission artwork, however if you want to dress up a pdf on a short budget, photobashing might be for you.
Advantages of Photobashing:
- Relatively Quick: Compared to learning to paint, learning to photobash is simpler and quicker to get decent results
- No Talent Required: Again, who needs to paint when you can just cut photos out and bash them together? You truly just need some cool ideas to be able to do this
- Can be Free: As long as you stick to free stock art, this process can be done completely free in a few hours
Disadvantages of Photobashing:
- Need for Stock Photos: There are some great sites that host free for commercial use stock art (I use pexels) but you are limited to the stock art you can afford to buy or what you can find for free, and the angles and perspectives there of
With all this in mind, I’m going to do a brief walkthrough of my process to create this piece of art from Transient Souls.
To begin I made a brief overview of my most used tools in Affinity Photo. Note that others may have been used and this doesn’t replace a good sit down with some affinity photo tutorials to figure out the interface.
To begin I grabbed my desired image dimensions from my pdf’s publisher file. In this case that was 5.125 in by 2.919 in. I also adjusted the color format to match what DriveThruRPG requires for printing. Once all this info was in, I created the file.
Once the file was open, I figure out what images I was going to bring in and downloaded them. I then went to File>Place… and selected all the images I wanted. Once I had selected open, and clicked on the canvas to place all the images, I had three layers with three new images on them inside the file.
Now that my images are in the file I can start cutting things out and bashing them together. First order of business is to cut out the flowers and vase, so I hide the monk layer and then select the flower layer. Now to be able to edit this layer in the way I want, I right click the layer and select rasterize and trim. This option changes the layer to a raster layer, which I can chop up and erase as I please. The trim also removes any parts of the layer that was outside the canvas area. Trimming prevents me from moving the layer later and needing to erase more of the background to the imported image.
Now I’m onto the meat and potatoes of the process. Using the freehand selection tool, particularly the polygon setting (found on the top left area beneath the menu bars when on the selection tool), I somewhat carefully click around the edges of the vase and flowers. This will allow me to select the outer area of the image so that I can remove it. You can see the dotted line/dancing ants in the image showing what how I used this tool to pick out the easier shapes on the flowers. I left the small yellow buds on the right of the vase, they were small and finicky. Instead for those I used the flood select set around a tolerance of 3% (again tolerance is found in the top left beneath the menu bars). Once I’m happy with my selections on both stages, I delete the background. The short cut to clear the selection is the delete key.
Note to be careful of what is being selected and what you are deleting. I have at times flipped and selected what I wanted to keep. Just keep an eye out for accidently removing pieces you want to keep.
You can see the results of this quick cut on the bottom right of the image. Its not great, and its pretty rough but it’ll get better.
So I’ve got a rough cut of the flowers, now I just need to clean it up so I can use it to replace a mans head.
This clean up starts by selecting the cut out. I do this by either Ctrl+clicking the layer or by going to Select>Selection from Layer. Then I shrink the selection by 2 pixels (don’t be me, put -2 into the dialog box so that it actually shrinks) by going to Select>Grow/Shrink. After shrinking the selection I then feather the selection (smooths the edges) by 2 pixels as well.
I shrink the selection to help remove any remaining background and make sure I only have the subject matter I wanted. I feather the selection to help smooth the edges and make the transition easier.
Once I’ve shrunk and feathered, I then invert the selection and delete whats left outside the flowers. As you can see, this cleans up the rough edges, particularly around the yellow buds on the right.
My flowers are ready. The monk is not. The monk still has a head. I’m going to remove that. Its a relatively simple process using the clone brush tool. First I removed the top of the head. For the clone brush to work you have to press Alt+click where you want to source from, in this case that was the rock face nearby. After I’ve marked the source I brushed across the head with a soft (0% hardness in the top left area) brush.
After removing the top portion of the monk’s head, I selected around the robes and removed the rest of his head and neck. I took this second to select around the robes just to make sure I didn’t erase any of the clothing.
While I had the neck hole of the robes selected, I also used the clone brush to copy down the vase texture onto the neck area.
Almost done with this flower vase man. I simply adjusted the lighting a bit to make it seem more like this vase actually sits on this robe (and exists in that cave).
I painted a dark color around the edges of the robe and underneath the base of the vase and set the layer to multiply at a lower opacity (just to make it less harsh). I added in a bit of a light to front and back of the vase as well, since the original monk had a front light and a back light, these were set to soft light mode and also lowered in appearance. Finally, I added a set of color lights, redish in the front and bluish in the back, set to a very low opacity hard light mode. These colored lights were to account for the differences in the color of light between the monk and vase.
You can see in the image that all these layers are nested beneath the flower vase layer. This confines them to within the vase so that the effects don’t bleed onto the monk’s robes or cavern. You can get layers to do this simply by dragging the ones you want to be confined onto the one you want to be shown (in this case, the pixel lighting layers onto the vase layer).
Finally the last adjustments I did were actual adjustment layers. In Affinity Photo these are found in the adjustments window (usually in the studio with the layers tab). I used them to adjust the base lighting of the vase to more closely match that of the monk image. I changed the intensity of the shadows and the contrast of the image. I believe I also shifted the overall brightness down a bit.
And with that, I am done with the flower vase man. This has more or less covered the process for photobashing.
- Find some images
- Cut out cool bits.
- Shove the cool bits together
- Adjust the lighting, colors, and contrast of the images to work together
Now I’m going to take the flower monk and put him into a new environment. Using the processes above, I cut out the monk and moved him to some new rocks. I then adjusted a bit of lighting on the floor where I placed him to make it match the new placement.
From there I worked on smoothing out the top portion of the monk’s image with the rocks. I did this by erasing with a large, soft eraser.
From here I did several things, but they were all variations of what has already been done. I cut out and copied over candles from the monk image to add them back to our current environment. To add in more glowing feel to them, I added some soft light and lighten layers on top with colored, soft lights. I also cut out and added in a wisteria flower branch to bring in another element.
Finally I added a gradient map adjustment layer with purples, pinks, and peach hues and used that to adjust the color of the image. I did this by setting the gradient map adjustment layer to color at 50% opacity and a duplicate gradient map layer set to hue at 50%. You can see what the image looks like at this point in the top of the image below.
Now that I’m settled with the photobash result, I’m going to apply the painterly effect.
First, I make a copy of the overall appearance of the image by going to Edit>Copy Flattened and then paste. This should produce a layer that is a copy of the image (just all on one flat layer). Then I added noise at about 50% intensity by going to Filters>Noise>Add Noise. I then denoised the image Filters>Noise>Denoise. Usually I set the Luminance and Luminance Detail settings to the value of noise I added (in this case 50%). Higher noise intensity and denoise intensity means less detail in the final piece, but a more painterly look. Finally I applied an unsharp mask. I haven’t found an idea setting for this filter, I mess with its options until I’m happy with the sharp edges it brings back.
The last thing I did was add a bit of fog (just low opacity, blurry blobs of white, you can use the Filter>Blur>Gaussian Blur to make the edges even softer) pushed up the lighting and adjusted the final contrast and darkness. I usually also add a vignette effect, with a layer of soft dark color around the edges set to multiply at a low opacity, and a very slight bright color at the center set to soft light at a low opacity.
That is all that I did to make this image for Transient Souls. I hope this information is useful for others. If you want to see more pieces of this type of artwork in action, I also used this technique for all the art work in Light of Winter, which is free and fully release. Just pop over to Itch.io and you can get a feel for what this technique can turn out.